My etsy Shop

Pages

Thursday, April 28, 2016

Carbo Brain

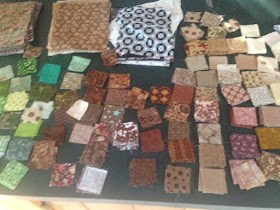
Sunday was supposed to be my fun day. After a lecture, workshop, 2 days of hanging with Henry, getting ready for Passover and prepping lots of the food, I needed a day of fun. This fat quarter assortment, called Prisma Elements, was sitting in my studio calling my name.

The pieces were too small for the initial project that I was thinking about, so I thought it would be fun to make a ditty bag with a drawstring closure. I started out with a bang, appliqueing the Curvalicious strips, adding the circles and quilting it all, using Annies Soft and Stable. It's an interfacing that really adds body. The bag can stand on its own.

Then my plans went awry. I blame it on my brain that was overloaded with carbs from the Passover Sedar and the leftover goodies. I swear, my brain was in a fog. I wish I had taken photos of all my mistakes. And it wasn't just once.

My first effort resulted in an elongated basket shape. I was so confident with the second effort that I cut out squares of the main body to make gussets. HUGE MISTAKE!! My third effort resulted in the adorable ditty bag.

Don't look too close or you will see where the squares that I cut out for the gussets, are patched in. I didn't have to share that, but I believe in truth in advertising. Sometimes people think that I dream something up and just make it. I wish that were so. Sometimes the project goes together effortlessly and other times it's just an enormous amount of trial and error. The ditty bag was the latter.

I tried out a new foot for blanket stitching the appliqué curves, a #23, from Bernina. It's called the appliqué foot.


I was a little skeptical when I first put it on. The foot I usually use, #20, is open across the front, allowing for a clear view of the stitching area. This new foot has clear plastic across the opening. It's also short, which is different. What sold me on this foot was this little mark to line up with the appliqué. It worked perfectly.

So now that I have worked out the details, another ditty bag is on my to do list. Hopefully I will have learned from past mistakes!


Friday, April 22, 2016

More Than A Baker's Dozen


It's starting to sink in that Curvalicious is here to stay.  It is in the homes of quilters as far away as Israel and the Netherlands and in many homes in the U.S.  I'm pinching myself that it is so well liked.  
Thanks to quilters and teachers and shop owners, it is now available in a bunch of shops, local quilt shops (LQS).  We all need to support our LQS, so they don't disappear.  Big box stores or Internet stores can't teach us how to make quilts or answer our questions, such as how much fabric do I need to make this border or why arent my blocks coming out right.  How can  we touch and fondle the fabric we may buy to see if it's soft or coarse or tightly woven?  I know where I live, many LQS are disappearing.  I learned how to quilt at my LQS, that is no longer there.  I learned how to teach, and that is a hands on skill, at another LQS that has disappeared.  So, I'd like to give a shout out and share the shops that now carry Curvalicious and accompanying patterns. I thank them and you should patronize them and keep your eye out for more patterns.  They are coming.

I just sold Curvalcious to my 14th shop.  Thank you to the owner, Erin Underwood at the Blue Hen Quilt Shop.  And if you enjoy your Curvalicious, recommend that your LQS carries it. It will be a win-win and new patterns will be available to you as soon as they are published. 

United States
Alaska
        Soldatna          Bearly Threaded Quilting

Delaware
     Dagsboro            Serendipity Quilt Shop
     Newark               Blue Hen Quilt Shop

Florida
     Jacksonville        Cinnamon Quilt Shop
     Jupiter                 Quilters Choice
     Key West            The Seam Shoppe
     Rockledge           The Quilt Place

Georgia
     Fayetteville          Quilt N Fabric

Pennsylvania
     King of Prussia       Steve's Sewing, Quilting, Vacuums, Appliances

New York
     East Syracuse        Knecht's Sewing
     Niagara Falls         Aunties Attic Quilt Shop

Vermont
     St Albans               Cowles Quilting Machines

Virginia
     Moneta                   The General Store at Smith Mountain Lake


Canada
Ontario                    Born To Quilt


Gratitude.  Yup!


Tuesday, April 19, 2016

Another One In The Books

The weekend in the mountains, started out chilly, but by the time Sunday arrived, it was a beautiful Spring day. The topics for the mosaics were a cat, two dogs and a grandson. The most diverse group to date.

Bailey was waiting for everyone to arrive.

Samples were hung as inspiration.

The first step was for everyone to cut up a bunch of fabrics. There were squares everywhere. Most of us willingly shared our squares. (Hahaha)

Someone set up their sewing machine to have the best view of the lake.

( and I don't blame her).


The mosaics progressed as the days passed.


Over the course of a couple of days, the quilts really evolved.


We were so busy eating all the yummy meals prepped by my hubby that the only photo I took was Sunday mornings yogurt bar.

Another great retreat. Two more coming up this Spring. I'm dreaming of a show with all these finished pet quilts and one boy. It would be wonderful.

Im starting to gather names for the next scheduled retreat for May 2017. Are you interested?


Wednesday, April 13, 2016

Don't Waste Printer Fabric

There's been a discussion about printing on fabric on a couple of lists to which I belong. I just want to add some of my tricks for printing on fabric when you don't have a full 8 1/2" X11" sheet of fabric that is prepared for permanent printing or you may want to print on a smallish piece of fabric. The commercially available pre-treated fabric sheets are expensive, costing upwards of $3/ sheet for my favorite (EQ), so I want to make sure that I use every single square inch.

Whether I am printing on regular fabric or the pretreated variety, I first print my word/image on a sheet of paper.

As soon as the paper comes out of the printer, I draw an arrow on the paper to remind myself which end goes into the printer first. Then I take the piece of fabric and center it over the printing on the paper. Usually you can see the printing through the fabric, but if not, hold it up to a window or use a light box.


Tape it down while smoothing it down really well, and put it through the printer again. It should go through like a charm as long as the printer can grab even the tiniest bit of paper.

Remove the tape and trim to size.

Pre-treated fabric, such as the EQ Printables, is adhered to a backing. If you are only going to use part of a sheet of this product, cut out the section you are using and do not remove the backing from the section you are not using.

  • Then, as above, print your image/words on a piece of paper. Spray the back of this product with reposition able glue. Then place it over the printing.
  • Smooth it down and send it through the printer.
  • Remove the backing from the fabric and you're good to go.


I save every little scrap and I have used pieces as little as 1"x2".


Sunday, April 10, 2016

Fun Friday

I was looking forward to getting out of the studio with a couple of the Quiltinis to visit the quilt exhibit at The Wayne Art Center, which is about 15 minutes from my house. This is a juried exhibit that is one of the premier quilt exhibits in the country. Anyone that still has the notion that quilts are made by Grandmas to be slept under, will be surprised. These quilts are works of art and definitely worth the trip.

Some years there is usually one quilt that we will say WTF? This year is was a 3-D full size oil drum type barrel created by a woman who usually makes the most gorgeous quilts. I did have several favorites and always love the hand stitching. One of my favorites was a quilt by Kathleen Loomis. She will be a speaker at my quilt guild, Calico Cutters, this October.

Unfortunately, no photos are allowed of the quilts. Thus always annoys me, because it us not to preserve the quilts. This ban on photography is purely mercenary. They want you to buy their catalog. Someone should enlighten them that sharing is a good thing and more people will come to see the quilts in person when they get a sneak oeek. Anyway, I'll get off my soapbox. Here's the link where you can see some of the quilts. www. Artquiltelements.org. The exhibit runs through April 30 and is worth the trip.

BUT, there was an exhibit of Teen Art in the public areas from local schools. I am often amazed by the talent.

This piece was behind the information desk.


This is what it looked like when you get a closer look.

Ca

Can you see the bits that make up this piece? How about closer?

And the expressive eyes?


The artist


Tuesday, April 5, 2016

Switching Course

I was in my happy place working on a new Curvalicious pictorial quilt.

I love the design process especially when it involves adding images to a scene. Deciding what to add and how to draw it and stitch it is a challenge that I really enjoy.

But then life/business gets in the way. I was accepted to teach at a convention in May of 2017 and they need photos of the samples in 2 weeks. 2 weeks! So here I am working on a half day Curvalicious skinny quilt class -2 ways.

They measure 16"x40".

The black and white one has multi colored circles and is linearly quilted with a walking foot. "Singing In The Rain" has monochromatic circles and is free motion quilted with swirls, curvy lines and angular quilting in the polka dot fabric.

The circles are stitched by hand on the black and white skinny quilt and by machine for the other.

The appliqué strips for "Singing In The Rain" are offset.

Curvalicious is so versatile. It's fun coming up with different patterns. These skinny quilts are certainly quick to do. They are like potato chips - can't make just one.