Showing posts with label tutorial. Show all posts

Wednesday, February 6, 2019

Grieving with Gratitude

Mini projects have worked out the best for be.  Small, quick to finish and without much planning.
My DIL's mother is undergoing chemo for breast cancer.  I wanted to make her something to let her know I was thinking of her and rooting for her wellness. A wonderful friend of mine (Thank you Jeanette) suggested I make these small pillows to protect the sensitive area by the port when wearing a seat belt.  

I found a few places with sketchy directions.  There were even some for sale on Etsy.  I thought I would share my easy peasy way of Chemo Port Pillows.   

I liked using fun and cheerful fabrics.  Who wouldn't smile every time they buckled up seeing some colorful flamingos.  You don't need much.
2 rectangles:  3   1/2" x  6   1/2"  
and
3" of  1/2" sew-in Velcro

Pin the Velcro in place, overlapping the edges, making sure only one side is in the seam allowance.
Place the fabric right sides together.  Stitch around with a 1/4" seam allowance leaving a 2" opening at one of the short ends.
Trim the corners and turn right side out.
Turn under the 1/4" seam allowance by the opening and press.
Stuff and stitch the opening closed.  
The velcro belts wrap around to keep them in place on the seat belt.
I made a bunch.  I thought she could use them for different cars or different outfits or share with other chemo patients.

I am also working on a quilt using someone else's pattern.  It's also easy peasy, but it's secret sewing.  I'm hoping to finish it soon.

I try to keep busy when I'm not in my studio.  Packaging orders from my Etsy shop really keeps my mind occupied.  I've learned so much about the best way to ship and how to label. I so appreciate my loyal and new customers.  You just don't know how much it means. Thank you.

I've heard from many friends from the past expressing their condolences.  I hooked up with my bicycling friends from years ago.  Did I want to go on a hike at Linvilla Orchards for Pie Day? Last day of the sale! I brought my little friend and had a wonderful time just not talking and just thinking about walking up and down the hills without tripping over roots and rocks.  Bailey was the star!
I was planning on buying the Dutch apple pie, but was lured away by the pineapple upside down pie that was one of the most delicious pies I have ever eaten.

I just never know when sadness will overtake me.  Sometimes the memories are hard.  The other day I was sitting in the parking lot outside of our Supermarket, crying my heart out,  remembering the last time Don went supermarket shopping. I can't even remember how long ago it was.  I received a phone call after he was gone about an hour. It was him. “ Could you please come get me?” He was sitting by one of the front doors. He didn’t have the energy to walk any more. It was the last time doing something he loved to do. He so enjoyed shopping and cooking.  I then became his shopper with his detailed lists.  I didn’t mind at all. I knew how hard it was for him to ask for my help and lose his independence. He’d give me coupons and codes. Sometimes I spent a good amount of time walking up and down the aisles looking for that special new product that neither of us would eat!  


Follow on Bloglovin


Wednesday, September 11, 2013

The 1 Hour Apron

 
I received a lot of requests for the directions to make this simple and easy apron. It is the perfect project to showcase a beautiful fabric or to make great holiday gifts.
 How about one for each holiday/season?
It can be made in 3 sizes and there's only 1 template per size.
 
You will need:
2- 1/2" D-rings
For the adult size:  1 yd for a one fabric apron
          (1 1/4 yd if the fabric is directional and the pocket needs to be cut from one selvage to another.)
          (You will need 1/2 yd of another fabric if you are going to make a contrasting pocket and ties.)
 
Childrens' size:  3/4 yd for a one fabric apron
                          (You will need 1/4 yd of another fabric for a contrasting pocket and ties.)
 
Cutting Instructions:
Cutting instructions are given for the adult size.  The children's sizes are in parentheses.
 
Below is the cutting diagram for bot the adult and childrens' aprons.  Use this as a guide.
  • Cut 2" wide strips for the ties.  You will need 3 (4)
  • Cut a rectangle of fabric measuring 24" wide x 30" long. (13"W x 20"L)
  • For the pocket, cut a strip that measures 8" high x 24" wide. (5" H x 13"W)
 
Here's a chart summarizing:

These are the only templates you need.  It's for cutting out the armpit.
 Click on this LINK . Open the template in another screen and you can print it.  Double check the size using the ruler as a guide.
 
Cut out the armhole using the template and orient
 it according to the pattern with the fabric folded in half.


Apron Construction:
1.  Fold under the top edge of the pocket 1/4". Press.
2.  Fold under again, a generous 1/4" .  Press.
3.  Stitch 1/4" from the edge with a matching thread.
4.  Topstitch as close to the edge as possible with a matching thread.
5.  Fold under the bottom edge of the pocket 1/2". Press.
6.  Position the pocket on the apron so that the bottom of the pocket is 9 1/2" (4") from the bottom edge of the apron.
 
7.  Pin the pocket in place and stitch along the bottom edge, 1/4" from the fold.
8.  Topstitch as close to the edge as possible.
9.  To make sections in the pocket, stitch from the bottom up about 1/3 of the way in from each edge.

 
10.Around the entire apron, except for the arm holes, fold under the raw edge 1/4", then fold it under again another 1/4".  Press. Sew 1/4" from the edge.
11.  Topstitch as close to the edge as possible.
 
Making the Ties:
 
Two ties are needed for the apron, 46" and 50" (35" and 39") in length.  If the 2" strips you cut are not long enough, you will have to join them. 
 
To achieve the least inconspicuous seam, join the strips at a 45 degree angle.  Place the strips perpendicular to each other, right sides together.  Sew from the inside corner straight to the outside corner.  Trim the seam to 1/4" and press open.
 1. Fold under 1/4"to the wrong side at each end of the ties. (you will do this 4 times.)
2.  Fold each tie in half lengthwise, wrong side in.  Press.
3.  Open and then fold each of the raw lengthwise edges to the middle.  Press.
4.  Fold in half again lengthwise.  Press.
5.  Following the diagram below, pin the ties to the apron with the arm hole fabric tucked inside each tie, leaving a 24" (20") tail at the waist.  (There will be as difference in length at the neck.)

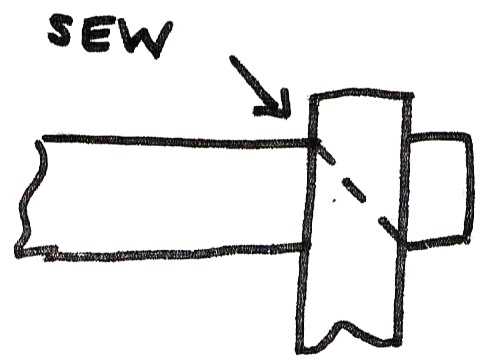
 6.  Sew the ties to the apron and finish the ties by sewing continuously along the lengthwise edges close to the edge.
7.  To add the D-rings:
  • Using the shorter  of the apron ties, slip on 2 D-rings.
  • Fold over 1" of the tie and stitch close to the end. (3X)
  • Stitch across the tie as close as possible to the D-rings. (3X)
  • And now you're ready to cook! Bon Appetit,
Follow on Bloglovin