

Showing posts with label Storm At Sea. Show all posts
Showing posts with label Storm At Sea. Show all posts
Thursday, October 8, 2015
Come See My Quilts
I'll be the speaker at my guild this month, next Wednesday, October 14. My talk is about taming dupioni silk and how to incorporate it into your quilts. I'll be sharing my most recent silk quilt plus many more. The meeting takes place at The Goshen Fire Company at 10:00am. 1320 Park Ave, Easr Goshen. Hope to see you there.


Thursday, September 24, 2015
I've Always Wanted to Make One
I am fascinated by quilts that are completely pieced with squares, rectangles and triangles, yet have what appears to be curves. My favorite of this is called Storm At Sea. I have always wanted to make one and I thought it would look stunning in silk, and it does! The quilt is made completely with silk dupioni. The construction of the quilt is very simple. It's made from 3 basic blocks: a small square in a square, a larger square in a square and an elongated diamond.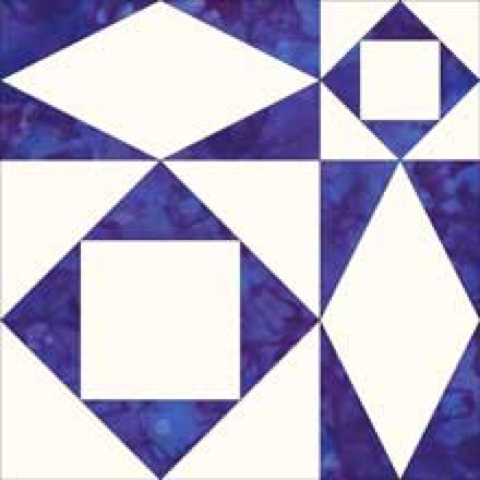
 I debated whether to finish the edges with a traditional binding or to face it, which is used for more artsy type quilters. I decided to use the traditional binding because of all the white. I thought that with a facing it would just run off the edge, especially when hung on a light colored wall.
  I liked Barbs comment. She told me that she loves quilting the silk because the stitches sink into the fabric, but she wouldn't want to piece it.
 I wish I were a better photographer so that you could see the iridescence of the silk. Here's a close up.
 I can't wait to share this quilt on its maiden voyage. I'm giving my "Sensational Silk" talk on Monday at the Quiltmakers of Boyertown. Maybe I'll see you there.
I used paper piecing for all of the blocks, because precision isn't my forte and precise points are important for this pattern. I found downloadable patterns here: http://www.generations-quilt-patterns.com/storm-at-sea-quilt.html
I made the quilt top almost one year ago while I was in Key West last winter. I hemmed and hawed about how to quilt it. I looked all over the Internet for some ideas. Frankly, although I conside myself a decent machine quilter, I was intimidated by all of the open white space. So when in doubt, contact a professional long arm machine quilter. Barb Persing has quilted another silk quilt for me and she did a wonderful job, and she did a great job on this one too.
Minimal quilting in the colored sections really lets the dupioni sing. I back all my silk for piecing with fusible tricot. It's important to stabilize it.
Thursday, January 8, 2015
The Top Is Done
In my previous post, I shared the beginnings of my silk dupioni Storm At Sea quilt. I have been sewing away. I finished it today. It has been an up and down journey - a love and hate affair.
It has taken me much longer than I expected. Why is it when you are nearing the finish line, so many things can go wrong?
 This layout was in my last post. I took my time putting it together. The paper makes it difficult to piece the blocks together. They slip. To get the most precise points, I baste them together first with the longest machine stitch on my machine. Then I go in and make adjustments, if necessary, by removing a section of the basting stitches.
This is how the main body turned out:
 The patterns in the design really are starting to show now. Can you see the curved lines?
There are several options for finishing and I chose one that would accentuate one of the patterns:
 I really love this layout. It really accentuates the curved medallion,but OOPS!, do you see my mistake in the upper left corner? Ratz! So I ripped and fixed and added the outer borders. Some very naughty words came out of my mouth as I realized I put one border on wrong side out and then when I went to rip it out, I realized I took off the wrong border. But finally the top is done. Yay!
.jpg) I added the skinny colored border using scraps. It added just a little pop of color.
I added the skinny colored border using scraps. It added just a little pop of color.
This is what tge back looked like when I was finished . The papers are all a bit ragged at this point.


This is how the main body turned out:
There are several options for finishing and I chose one that would accentuate one of the patterns:
This is what tge back looked like when I was finished . The papers are all a bit ragged at this point.
I shorten the stitch length when stitching to the newsprint paper foundation.
This helps the paper to come off easily.
My set up here isn't conducive to quilting, so I will roll it up onto one of those swim noodles and try to come up with a plan to quilt it when I return to PA.
In the meantime, if you haven't done any paperpiecing and would like to try, I designed a simple little birdhouse quilt a bunch of years ago. You can get the free pattern HERE.
Subscribe to:
Posts (Atom)