Showing posts with label Thread dyeing. Show all posts

Tuesday, May 7, 2013

It's All Fun!

What could be better than a workshop where you don't have to bring a sewing machine, fabric or any sewing supplies?  How about a workshop where you don't have to stress about color choices or if you have the exact seam allowance?  What if you got to choose from lots of colors to dye yards and yards of fabric?  It's a no brainer and it was lots of fun today as Calico Cutters Quilt Guild had a fabric dyeing workshop - at my house. 
 
I spent a day making up about 10 gallons of dye in about 20 different colors for my fellow guild members to play with.  I'm so happy I didn't have to schlep everything to a different location.  The workshop was Chez Lynch. They just had to bring lunch and come in clothes that they didn't mind were splashed with dye.  Fiber Reactive Dye is just that - and it's permanent. OOPS!   Holly didn't mind! Who spilled that dye on her???  I won't tell.  It matches her shirt.
 
The plan was to dye outside.  No mess indoors and if something spills, the grass would hide it.  But Mother Nature wouldn't co-operate.  It was chilly, the grass was wet and the forecast called for some intermittent spritzing.  So I waited for the last minute to clean out my garage.
 
 We started the day by ripping 4 yds of fabric into fat quarters.
Soaked them in a soda ash solution and started dyeing.

 
Everyone had their own dishpan to keep their baggies.
it was a beautiful thing to watch them fill up.  Everyone went home with 18 baggies each with its own fat quarter.  They would sit overnight and washout would come in the morning.
 
We did single color dyeing, single color gradation dyeing and 2 color gradation dyeing. We had some extra time and those who wanted dyed some cotton thread.

 
Our guild meeting is tomorrow, Wednesday.  I am keeping my fingers crossed that some of my new dyers wake up early enough to do a washout and dry their fabrics in the morning. This reveal is the best part of dyeing your own fabric. And,  I'd love to see some hand dyes at Show & Tell.
 
I do really enjoy sharing the fabric dyeing experience.

Thursday, April 4, 2013

Why Do I Have To Dye My Own Thread?

I know I have said this before, actually many times.  I make my life so much harder then it needs to be.  I am finishing up a project and want to do some hand stitching/embroidery in the borders. Couldn't I use commercially available thread? Isn't there some color that would work for me?
Noooooooo, I have chosen to dye thread for this project.  I want it variegated.
 
Thread dyeing is actually very easy.  this project took me all of 2 hours, including digging out my dyes and prepping my work area and the solutions. 
 
I decided to dye 3 different threads.
 This is a cotton crochet thread that I bought at AC Moore.  It is a 10 weight.
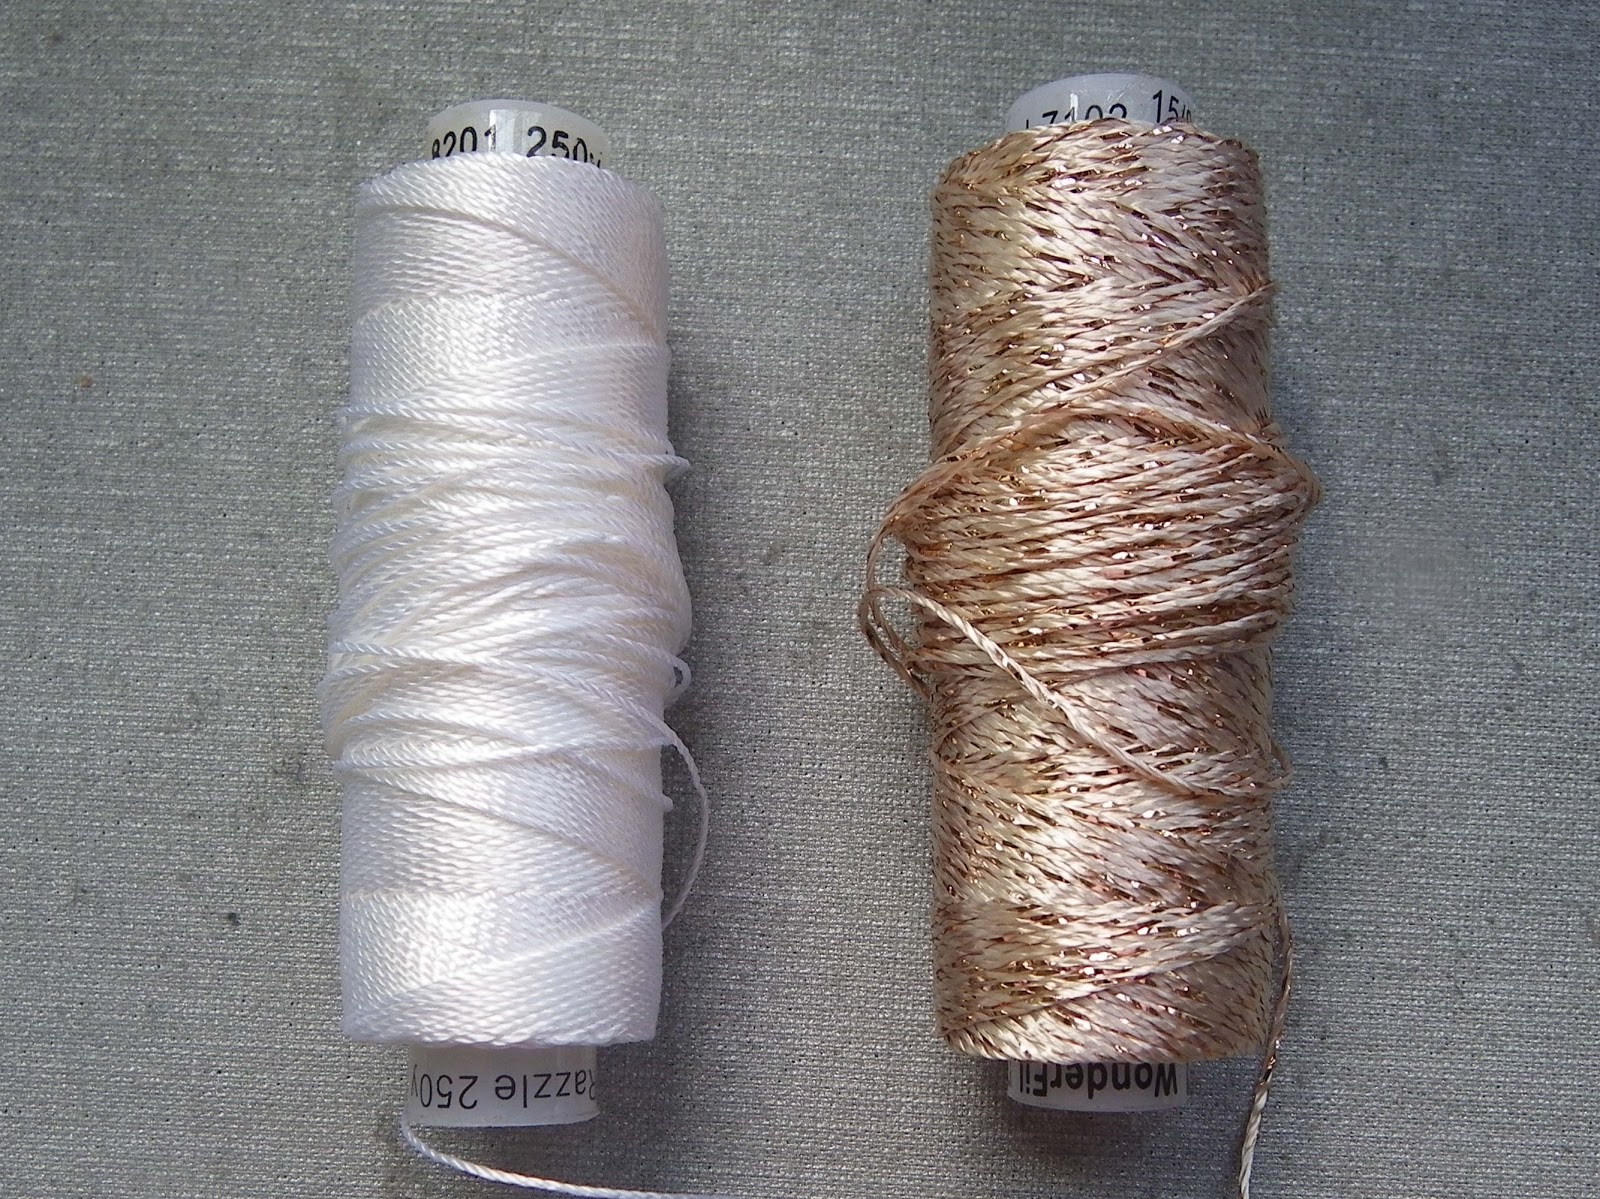
These threads are rayon and they are sold by Wonderfil.  They are both 8 weight.
The one on the left is called Razzle. 
 The one on the right is Razzle with one strand of metallic thread and it is called Dazzle.
The first solution to prepare is a soaking solution made from soda ash. It is actually sodium carbonate and can be bought from a dye house or from a swimming pool supply store.
*****When working with any of the solutions and chemicals, you should :
Wear gloves and protect your clothing. 
Any items used for dyeing should be dedicated for dyeing only. 
Never use measuring utensils for food prep afterwards.
Never store any of the solutions with food.
 
Step1:Soaking Solution Prep
Add 1/2 Cup of soda ash to 1/2 gallon of warm water.
Step 2.  Soak the thread in the soaking solution for at least 15 minutes, but it can be left longer.

 Step 3.  Make up dye solutions in the proportion of 1/2 tsp of dye powder in 1/2 Cup of warm water, using Pro MX Fiber Reactive dyes. (I buy mine from ProChemical  & Dye Company.)
 (Use a dust mask when measuring out the dye.)
 To avoid the dye from clumping, add a little bit of water to make a slurry and then slowly add the rest of the water.  Label all of the jars.  These dye solutions last for several months at room temperature. (I used chartreuse, turquoise and grass green.)
 Step 4.  You can test the colors and how they will interact using a paper towel.
 Protect your working surface with either plastic wrap or work in a plastic bin. 
 Step 5.  Make a skein of thread and lay it out on the plastic wrap.
 Step 6.  Paint on the dye with a dabbing motion using the foam brushes. 
Make sure you have one brush for each color.
I overlapped all of the dyes to get more of a variety of colors.
 Step 7.  Wrap the dyed, wet thread in the plastic wrap and let it sit overnight.
 Step 8.  Wearing gloves, remove the thread from the plastic wrap and rinse it in cold water,
until the water is clear. Hang it to dry.
 
I used the same dyes on all 3 of the thread types.
The threads from the top down are: Dazzle, Razzle and cotton crochet thread.
 
Notes:
1.The soaking of the thread in the sodium carbonate solution is the most important step.  Without this step, your dye will wash out or run if it is washed.
2.  All of the literature I have read indicates that the dye and dye solutions are non-toxic.  As a former chemist, I treat all chemicals with respect and treat the dyes and solutions as if they are toxic.  Better safe than sorry.
3.  The dyes will stain your hands and your clothes.