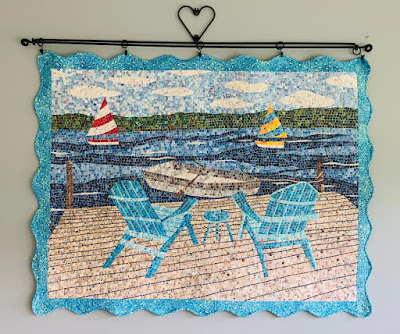
I like using a scalloped border, whether it is the inner, outer or edge.
It really makes a plain border, very elegant and special.
I used it on my quilt, "South of France", as the inner border:
and on my first large mosaic quilt," Keyfetti Fish", created while wintering in Key West. This border is scalloped and a facing was used to finish the edge. (It was photographed on a black background.)
35" x 48"
I have used a few diffferent methods to create a scalloped border for a quilt. The key to them all is, Curvalicious.It's a cutting guide I developed about 5 years ago. I designed it to make curved looking quilts, but I found out that I could use it for amazing and complex looking borders.
It measures 24" long. The Curvalicious website shares lots of ways to use it as well as a link to my YouTube video demoing it as a border tool.
When the quilt's dimensions are divisble by 6, a mitered border might be the best method to use. Otherwise, the method I used for Whitney Lake works well and is pretty simple.
First, I added a 4" border all the way around the quilt.
It is a bit of a challenge to cut through all the layers, but it's so worth it. Sometimes you need a little scissors help. To achieve balanced corners, make sure you stop about 6" from the edge.
Using tracing paper or parchment paper, or any paper you can see through, create a curved corner. I fold the paper in half to make sure it's symmetrical. I use that template to trim each corner.
Then I made a 2" strip of bias binding. After stitching it to the front with 1/4" seam allowance, I turned it to the back and with the help of wonder clips, I handstitched it to the back.
And Voila!
A border that really frames a quilt.


No comments:
Post a Comment
Thanks for stopping by. I'd love to hear from you.