Showing posts with label baby gifts. Show all posts

Thursday, September 19, 2013

A Quick Baby Gift

I am definitely in baby mode, but this time the gift is not for my new grandson Henry. 
I'm meeting a friend for lunch.  Her baby is 6 weeks old and
 I just wanted to bring a "little something". 
 
My goal was to make a gift from what I had on hand.  Surely, with shelves bulging with fabric, I should be able to do this.  My time was limited, so quick and easy was important.  My friend Kelly made this cute onesie for Henry. 

 
It was quick and adorable, but it meant I would have had to leave my house and buy a onesie.
 
So I chose to make a burp cloth.  The only thing I needed was some paper to make a pattern.  I normally have a roll of newsprint for pattern making, but I am all out.  So what did I have that I could use? A paper grocery bag.
 
 
I cut it open

and cut out half a pattern.  I designed it with a curve so it can snug around  the neck.
Then I placed it on the fold of a 9"x22" rectangle.  Do you recognize this fabric? I used it for Henry's receiving blanket. I love this fabric.  My husband suggested that I make myself some pajamas from it.  I  bought all they had at my Joann's, but it wasn't very much.  I checked a couple of others without any luck.  My friends checked their Joann's without finding it either.  A lot of people must have liked it.  If you find it, PLEASE let me know.  I would love more of it.
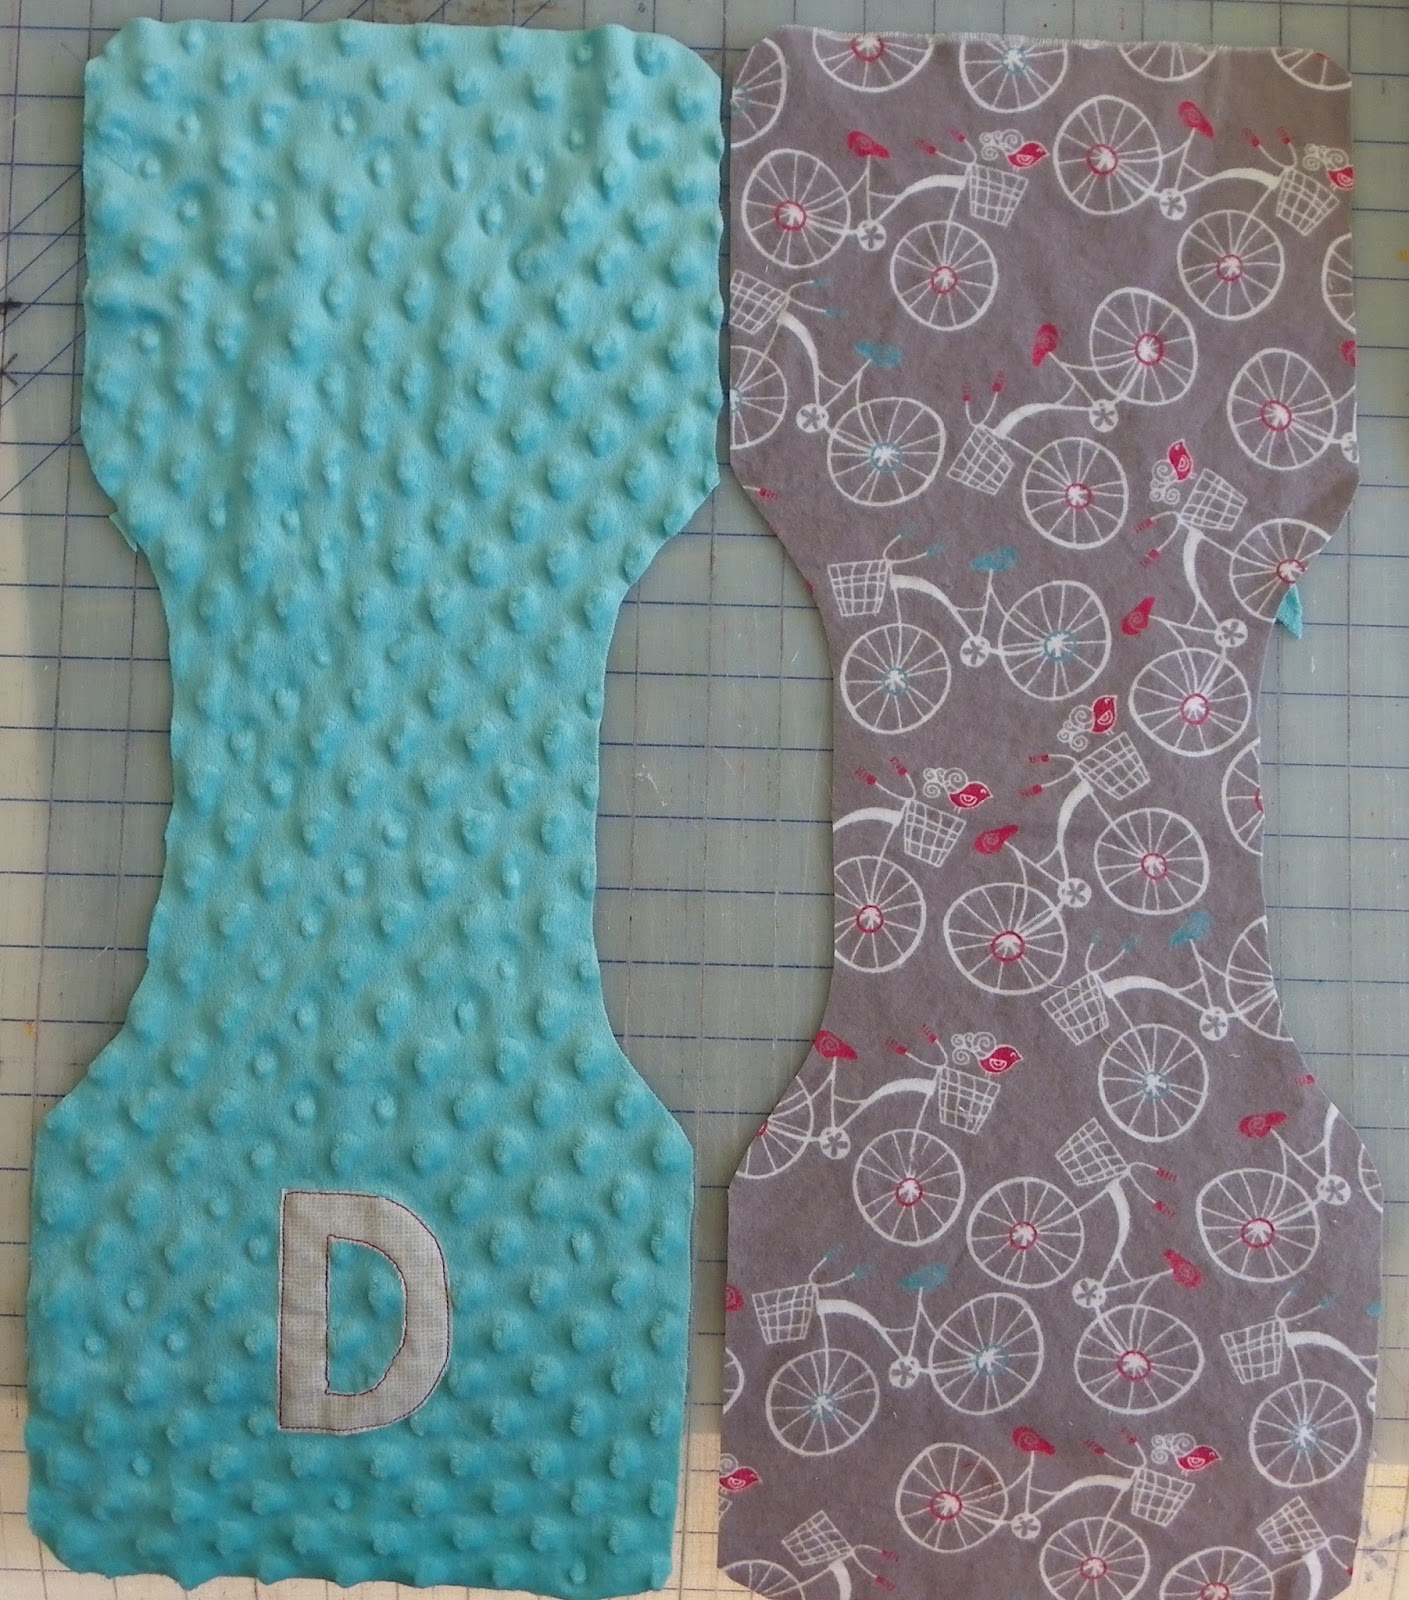
I chose 2 very soft fabrics ,minkee and flannel, so either side would feel wonderful on a  baby's cheek.  I appliqued the baby's initial on the minkee side, before I placed the 2 fabrics right sides together.
Minkee is very slippery.  The key to success is to pin like crazy and use a 1/2" seam allowance.
I also used  a walking foot
to help to keep the fabric from slipping.
After sewing, I clipped the inner curves.
I turned it right side out and stitched close to the edge to close the opening.


Follow on Bloglovin


Monday, November 14, 2011

Fun Baby Block Gift


I needed a baby gift.  I saw an adorable baby playing with a stuffed baby block with  tags on a blog called Simplify .  It is featured in the winter issue of  Quilts & More .  I did not have time to go out and buy the magazine, so I searched and found a bunch of different methods for putting the block together on the Internet.
 I chose the steps I liked from a few of the blogs and added a few twists of my own.  I always like to streamline projects by combining steps to make them easier and quicker. 
 It is easier to adapt someone else's directions.  Here is my method.
Start with 7" squares of 6 different fabrics.
 Quilt with a walking foot.
 Embroider the baby's name or add a fusible letter or any kind of applique.
 Trim the squares to 6 1/2" and lay them out in the shape of a cross.
 This is the most important step and one that was present in everyone's directions.  Mark the seam allowance in each corner, on the wrong side.  I used a 1/4" seam allowance so my mark was 1/4" in from each side.

Choose an assortment of colorfast ribbons and rick rack and cut them to 4".

 
 Sew 2 squares together with a 1/4" seam allowance, starting and stopping with a few backstitches at the mark in the corner. Include 1 or 2 pieces of ribbon in the seam.   Press.
 After sewing the 6 squares together in the shape of a cross, its' time to start making the cube shape.  Continue sewing the sides together making sure you start and stop at the corner mark.  Leave a 3" opening when attaching the last side.  Stuff. I like mine loosely stuffed.  Whipstitch the opening closed.


Welcome to the world baby Chloe.  I think you will enjoy this in a few months.

Tuesday, September 22, 2009

Girls, Girls, Girls


This is the summer of girls - baby girls that is. Of all the many babies born in my circle of friends/family , they are all girls. Sweet little bundles of joy. Three of them are granddaughters of my friends and the other two are twins, just born on the 22nd to my son's future brother-in-law.
I wanted to make a little something for my friends to celebrate. Two of the babies have unusual names, so I thought something monogrammed would be nice. Easy, simple - burp cloths - using the pre-fold cloth diapers. The search for cloth diapers led me to Babies R Us. I had never been to that store before. What a store. It took me a while to find the cloth diapers. (Hint - They are not located with the disposable diapers. Logical?) I bought 100% cotton - premium - package of 6. Then I bought fat quarters of the prettiest pink fabric that I could find.
First, I embroidered the name 5 inches from the bottom with a very girly font. I couldn't find a font that I liked in my Bernina software, so I downloaded a font from www.dafont.com. This website has tons of fonts and most of them are free, if you use them only for personal use.
Then I cut the fat quarter of the cotton fabric in half so that I had a piece that was 11 inches deep. Press the long edges under 1/2".
Fold the cotton in half lengthwise, right sides together. Lay it on top of the cloth diaper on the monogrammed side.
Trim the sides so that they protrude about 1" on each side.


Turn the diaper over and sew up the sides barely catching the diaper in the seam. (It's a little hard to see.)


Trim the edges to 1/4".
Then turn the fabric right sides out.
At this point the diaper will be encased with the cotton fabric.
Pin to secure and then sew around all of the sides, 1/4" from the edge.
Done!