Sunday, September 15, 2013

Sunday In The Saddle

It's been 2 Sundays since I have gotten back in the saddle. After the difficulty I had on my ride 2 weeks ago, I decided that I needed a care free and stress free ride - and I needed to have my trusty companion with me.  I did skip one week last Sunday since I was too jittery to ride waiting for the news of Henry's arrival.  We know how that ended - with the birth of my wonderful little grandson. 
 
We headed over to the Schuylkill River Trail (SRT).
We started in Valley Forge and rode to Manayunk.
 Since it was such a nice day, there were lots of cyclists and walkers too.
I pass this building every time I ride the SRT.
and always wondered about the Rambo & Regar Globe Knitting Mills.
This was a good excuse to do some googling.  I didn't find much except that it was built in 1897.
My riding buddy surveys the landscape.
I need to make a liner for the basket to make it comfy for her.
 The path is paved along the river.
There were lots of friendly people riding their bikes today.
They all loved Bailey and either wanted to pet her or take her photo.
It was a good ride.
 
 Statistics:
Bike: Hybrid
Distance: 31.2 Miles
Avg mph: 12.5
Time in the Saddle: 2:29 hrs
Real Time: 3 Hrs
Follow on Bloglovin


Friday, September 13, 2013

My NYC Hotspots

I needed a New York City fix. 
The Bolt Bus is my preferred mode of transportation from Philly.
I leave the driving to them - with free WiFi!
 
It was a little eerie entering the city, the day after 9/11.
Heading into the Lincoln Tunnel, going under the Hudson River into Manhattan.
 
The first stop was my favorite silk store, Butterfly Fabrics located at 256 W 39th St.
I could take a yard of every single color.
All of their fabric is imported from India.
Next stop, Daytona Trim, which is right across the street.
They must have every color and size of ric rac that was ever made.
 There is always something new to discover.
Today it was a store that sold only zippers.
These colors are just yummy.
 
On my way to meeting my cousins for lunch, I passed a shoe store with a big SALE sign in the window. I doubled back to check it out.  They had the funkiest shoes that I have never seen before.
I came home with this great pair.  I couldn't resist.
 
 
Follow on Bloglovin

Wednesday, September 11, 2013

The 1 Hour Apron

 
I received a lot of requests for the directions to make this simple and easy apron. It is the perfect project to showcase a beautiful fabric or to make great holiday gifts.
 How about one for each holiday/season?
It can be made in 3 sizes and there's only 1 template per size.
 
You will need:
2- 1/2" D-rings
For the adult size:  1 yd for a one fabric apron
          (1 1/4 yd if the fabric is directional and the pocket needs to be cut from one selvage to another.)
          (You will need 1/2 yd of another fabric if you are going to make a contrasting pocket and ties.)
 
Childrens' size:  3/4 yd for a one fabric apron
                          (You will need 1/4 yd of another fabric for a contrasting pocket and ties.)
 
Cutting Instructions:
Cutting instructions are given for the adult size.  The children's sizes are in parentheses.
 
Below is the cutting diagram for bot the adult and childrens' aprons.  Use this as a guide.
  • Cut 2" wide strips for the ties.  You will need 3 (4)
  • Cut a rectangle of fabric measuring 24" wide x 30" long. (13"W x 20"L)
  • For the pocket, cut a strip that measures 8" high x 24" wide. (5" H x 13"W)
 
Here's a chart summarizing:

These are the only templates you need.  It's for cutting out the armpit.
 Click on this LINK . Open the template in another screen and you can print it.  Double check the size using the ruler as a guide.
 
Cut out the armhole using the template and orient
 it according to the pattern with the fabric folded in half.


Apron Construction:
1.  Fold under the top edge of the pocket 1/4". Press.
2.  Fold under again, a generous 1/4" .  Press.
3.  Stitch 1/4" from the edge with a matching thread.
4.  Topstitch as close to the edge as possible with a matching thread.
5.  Fold under the bottom edge of the pocket 1/2". Press.
6.  Position the pocket on the apron so that the bottom of the pocket is 9 1/2" (4") from the bottom edge of the apron.
 
7.  Pin the pocket in place and stitch along the bottom edge, 1/4" from the fold.
8.  Topstitch as close to the edge as possible.
9.  To make sections in the pocket, stitch from the bottom up about 1/3 of the way in from each edge.

 
10.Around the entire apron, except for the arm holes, fold under the raw edge 1/4", then fold it under again another 1/4".  Press. Sew 1/4" from the edge.
11.  Topstitch as close to the edge as possible.
 
Making the Ties:
 
Two ties are needed for the apron, 46" and 50" (35" and 39") in length.  If the 2" strips you cut are not long enough, you will have to join them. 
 
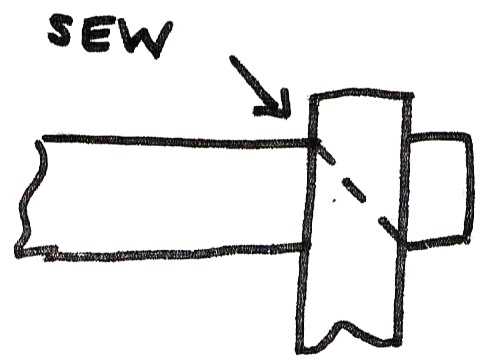
To achieve the least inconspicuous seam, join the strips at a 45 degree angle.  Place the strips perpendicular to each other, right sides together.  Sew from the inside corner straight to the outside corner.  Trim the seam to 1/4" and press open.
 1. Fold under 1/4"to the wrong side at each end of the ties. (you will do this 4 times.)
2.  Fold each tie in half lengthwise, wrong side in.  Press.
3.  Open and then fold each of the raw lengthwise edges to the middle.  Press.
4.  Fold in half again lengthwise.  Press.
5.  Following the diagram below, pin the ties to the apron with the arm hole fabric tucked inside each tie, leaving a 24" (20") tail at the waist.  (There will be as difference in length at the neck.)

 6.  Sew the ties to the apron and finish the ties by sewing continuously along the lengthwise edges close to the edge.
7.  To add the D-rings:
  • Using the shorter  of the apron ties, slip on 2 D-rings.
  • Fold over 1" of the tie and stitch close to the end. (3X)
  • Stitch across the tie as close as possible to the D-rings. (3X)
  • And now you're ready to cook! Bon Appetit,
Follow on Bloglovin

Tuesday, September 10, 2013

Don't You Love The Name Henry?

You bet I love that name, Henry. It's the name of my new grandson, my first grandchild.
Hip, Hip, Hooray!
He was born on Sunday, 2 weeks late, weighing in at 7lbs 4oz and 22" long.
I do not have permission to share a photo,
 so I will share the receiving blanket I made while awaiting his arrival. .
While my DIL was in labor and delivery, I headed to the nearest fabric store. I had to do something.
I found this wonderful flannel, with bicycles, at my local Joann's and they were having a great sale.
 Almost all of their children's flannels were $2.99/yd. A great deal.  I washed it beforehand since I was worried about shrinkage.  It wasn't too bad and it was sooooo soft. 
I used it for the back and binding and purchased minkee for the top.
I used the Missouri Star Quilt Company video that I shared in a recent blog post to make the self-binding baby blanket. If you did not see the photo of Jenny Doan and the You Tube video embedded in the post,
 here is the LINK
 
As soon as the grandbaby was given a name, I got to work:
I embroidered his name on the minkee.
I'm sure this will be the first of many.
Welcome to the world Henry.  I'm so happy to meet you.
 

Follow on Bloglovin


Friday, September 6, 2013

Self Binding Napkins, OLE

I had a fun afternoon making these napkins.  They are for a fundraiser for my quilt guild.  Every quilt guild that I visit is always looking for ways to raise money to pay for their programs.  It is a universal problem.  Dues just don't cover all the costs.  This month my guild is having a Chinese auction entitled "Guess What's For Supper?".  My friend Hattie and I are making up a basket with a Mexican theme.  I found this great chili pepper fabric on a sale rack in a quit shop and fell in love with the geometric patterns.  It has been sitting on one of my shelves waiting for a project.
I got the idea for making these double sided napkins watching a video from the Missouri Star Quilt Company for a receiving blanket.  It had these great mitered corners.  Why couldn't it be downsized for napkins? 
 
Jenny used a backing of a 40" square and a 30" square for the right side.
For the napkins, my backing was a 20" square and the front was a 13" square.
Watch the video for directions and make sure you check out their website  and their other tutorials.  I just don't know where people come up with these clever ideas.
 
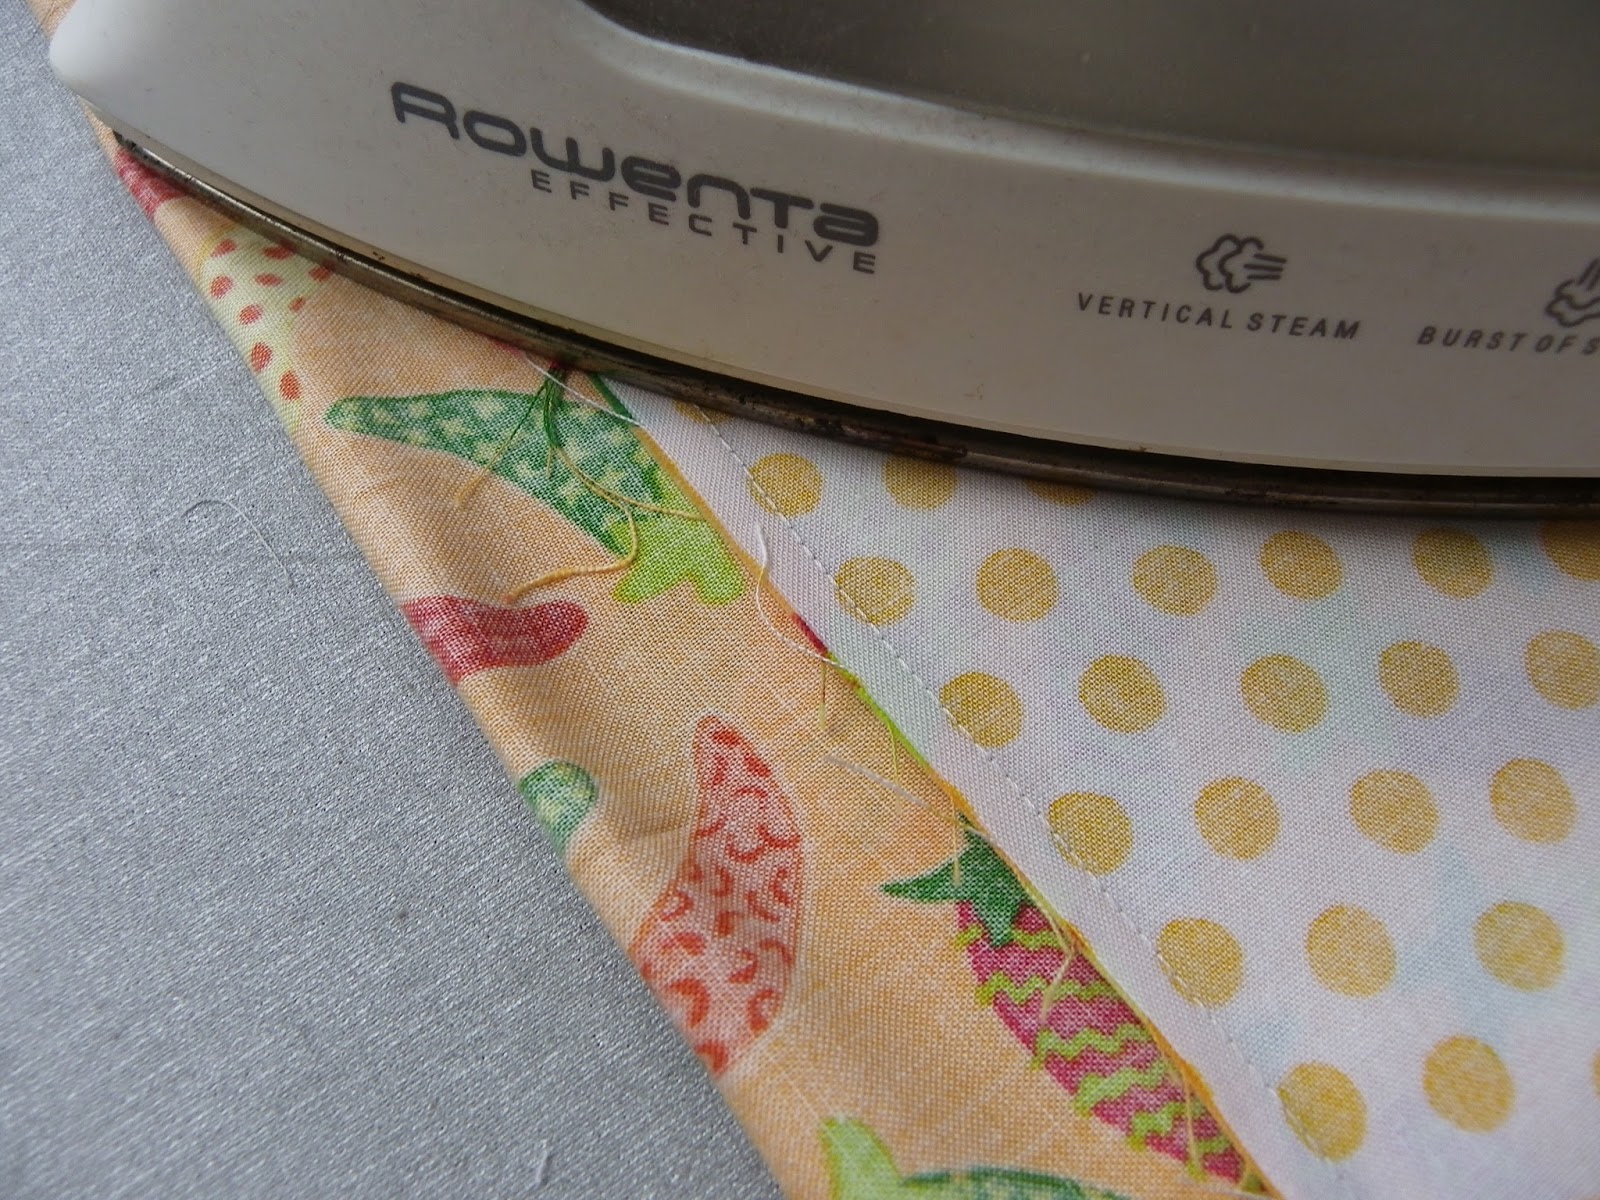
To make the topstitching easier, I ironed the polka dot fabric to the chili fabric before I turned it right side out.
I topstitched around the border on the outside and inside edges.
 
My friend Kelly made napkins a while ago and blogged about it here using directions from this blog, Be*mused, with pretty similar results.
 
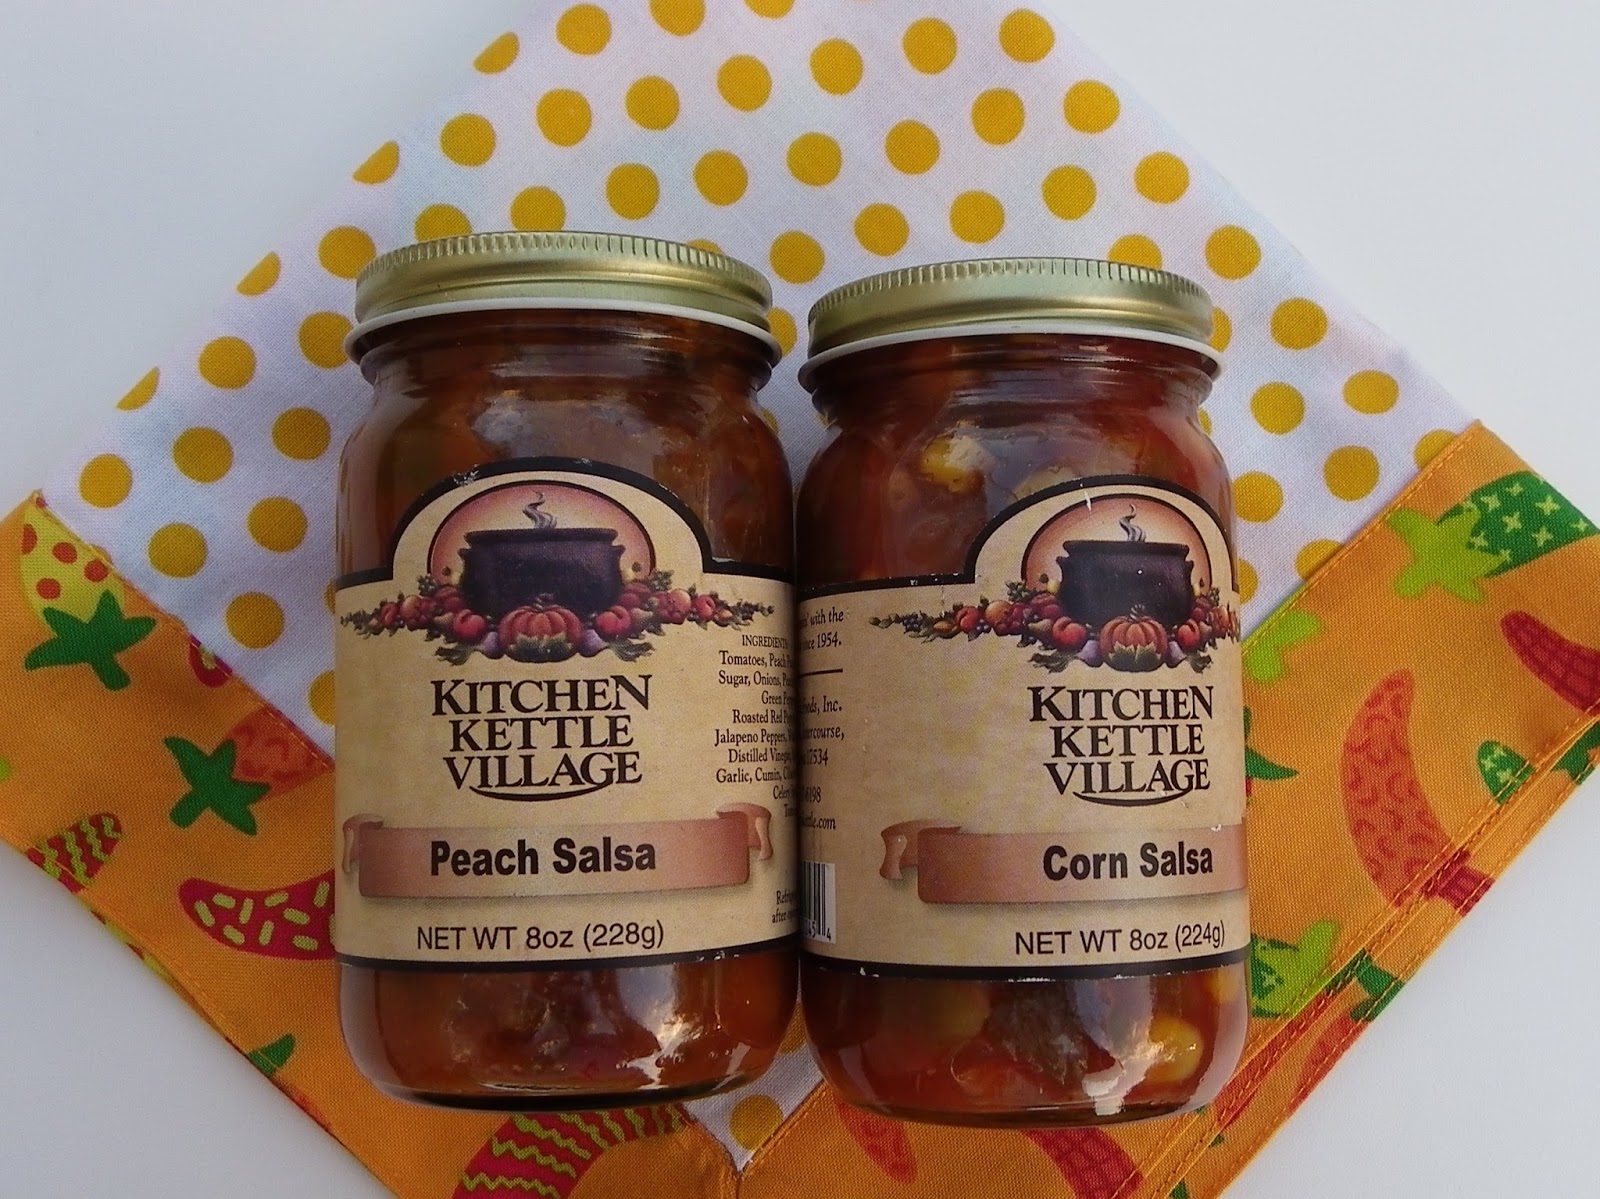
What else are we going to put in our basket?
Salsa, and of course nachos.
Yummy Mexican cookies.
Maybe some of this Freida fabric, or if there is time maybe it will become an apron.
 
And some other fun surprises.
 
I can't wait to see what our other members put together. 
I just know we had a great time brainstorming ideas.
 

Wednesday, September 4, 2013

My New Favorite Font

This is my new favorite font. 

               Janda Quirky Girl
I  just love the name. 
You can find it on this page at 1001 Free Fonts and download it for free.
I am working on a quilt for a special little girl and her mother. 
 I had the perfect spot to put her name.  I did it with fusible applique and a machine blanket stitch.
The top is done, the back is pieced and I will share it as soon as it is quilted.

Monday, September 2, 2013

Sad Day In The Saddle

I had a bad ride on Sunday.  A very, very bad ride.  The good news is that I did not fall and/or break anything. The bad news is that I became dehydrated and that resulted in leg cramps. 
 It is very hard to stay upright when your legs are cramping.
 
I started out the day on an organized ride put on by the Delaware Valley Bicycle Club.
 
 They offered a bunch of different distances, 26, 50, 65, 80 or 100 miles. (Yes, 100 miles!) I chose the 65 mile route.  I did a ride that distance the last 2 weekends, so I thought I would take on the challenge.  I love doing these organized rides because there are lots of people and  there are food stops along the way with fruit, water and yummy baked goods. 
 
 I have something to share.  I have a terrible sense of direction.  One of my biggest fears when I go on one of these rides is that I will get lost. They do supply you with a cue sheet.
Most riders have a computer on their bike to track distance, speed and time, so in combination with the cue sheet you know where and when to turn.  In addition there are marks on the road:
Some rides, the routes are marked better than others. And then sometimes there are the cyclists ahead of you to follow, provided they do not miss the turn. 
 
I took this one photo before the first rest stop:
The scenery was hilly and beautiful. 
Who knew there were lots of beautiful horse farms in Coatsville.
 
But this is where my picture taking ended.  I started feeling like my legs were like logs and I was riding along at a snail's pace.  I thought I had run out of energy.  In cycling terms, it's called bonking.  I started making my own rest stops.  Lots of them. Then I felt the twinges of leg cramps beginning.  The best remedy is consuming TUMS.  I always carry them in my little bike pack.  2 TUMS, 4 TUMS - can you overdose on TUMS?  I started walking up the hills.  I finished ALL of my water.
 
I was at 41 miles, my legs were starting to really cramp, I turned the corner and saw a HUGE hill.
Thanks goodness for cell phones.  I called my White Knight and his (really my) faithful companion: "Come get me!"
As I hobbled into the car, I noticed the thermometer read 87 degrees.
It didn't seem that hot on the bike, but leg cramps are a classic sign of dehydration.
Lesson learned.
 
Statistics: 
Jersey:
This was a jersey from a cycling trip to Prince Edward Island with my son in 2004.

Distance: 41.66 miles
Avg mph: 11.6
Time Pedaling: 3;33
Real Time:  ??? Seemed like forever