Tuesday, August 30, 2016

Has This Ever Happened To You?

Here is the same Mini Mosaic quilt with 2 different borders.

The one on the left was made first. I put the borders on, stitched the binding to the front and then hand stitched it to the back. I thought I was done. Another Mini Mosaic quilt for my collection. It reminded me so much of Key West. I hung it on my design wall the next day and .....

Decided that the border just didn't work for me. It was too matchy matchy with the flamingo and really detracted from the main subject. I was unhappy. How could I have gone wrong? Should I just leave it with the peachy border and move on to the next one?

Has this happened to you? Where you thought you were done and realized, it just wasn't working for you? It wasn't what you had envisioned? Is it time to rip?

It was for me. I removed the binding, iand then the borders. It was a small quilt after all. Then I auditioned other fabrics and thanks to the advice of some friends, chose a green batik.

It kept the tropical feel that I wanted while still letting the flamingo be the star. Now to move onto my next Mini Mosauc quilt. I just love making them.

On another note, I just sent out my first monthly newsletter. If you're not on my mailing list and you didn't receive it, you may want to take a look. I was so happy with all the positive feedback that I received. It has some great content including a video tour of my studio, a very cool app to transform photos and a company worthy recipe from Don' s Kitchen. If you want to check it out click HERE. And if you like it, I hope you'll subscribe. You can do it on the right side bar of this blog. If you have trouble subscribing, just e-mail me.


Friday, August 26, 2016

Quilts Tell A Story

This was the view as we drove into Washington DC to visit the relatively new location of the Textile Museum.

The museum used to be located on Embassy Row and it was tiny, but became part of George Washington University and now has a beautiful new home.


I heard about an exhibit a couple of months ago, called "Stories of Migration: Contemporary Artists Interpret Diaspora". I originally heard the word diaspora in relation to the Jews. I wasn't really sure what it meant, but the pieces in this exhibit explained it so clearly. I would use the word dispersion as a synonym. The dispersion of ethnic groups can be voluntary or involuntary. This was the basis of the story that each of these fiber prices told.

The interpretation of this theme by 44 textile artists was amazing. I expected to see 2 dimensional quilts hanging on the walls. Instead it was fiber art represented as quilts, sculptures, video and even a piece that was hanging from the ceiling. Honestly I was curious as to how these pieces were delivered to the museum.

Interestingly, we were listening to NPR on the way to DC and there was a broadcast about the National Park Service and the making of one of the Japanese internment camps, Manazar, into a National Historic site. One of the first pieces I saw was about the Japanese children being sent to one of these camps during WWII.

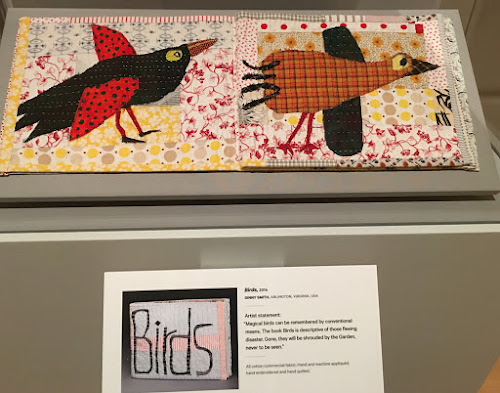
Following are a bunch of photos I took of the diverse pieces along with the artist's statements that I thought were so very thought provoking, far ranging and diverse.


There was also a patriotic textile exhibit. Did you know that it wasn't until 1840 that politicical campaigns were coordinated on a national level? They started to use promotional textile material such as bandanas and flags. William Henry Harrison had a 10 foot ball covered with campaign material that would be rolled from town to town - "let's keep the ball rolling".

There is not much time left to see the Diaspora exhibit. It closes September 4th. I will definitely watch for the upcoming visits at this museum. They seem to be able to combine history and textiles in such an interesting way. Click HERE if you'd like to visit their website.


Wednesday, August 24, 2016

Good Bye?

It's so hard to throw away fabric and books and magazines. Does it make it any easier to donate it or give it away? When do you have too much stuff? Like most quilters, I have enough fabric to last me for the rest of my life. There is a saying, "whoever dies with the most fabric wins". There are lots of other sayings, but I'm sure you've heard lots of them.

I knew it was time to destash when I bought a longarm quilting machine. We had to empty and remove 3 bookshelves that were full. The bookshelves were used to close off the dinngroom from the living room. This is what it looked like when the shelves were removed.

Then I had to find a place for everything and that's when I became ruthless when it came time to decide what to keep and what to let go. This is my foyer with my donations.

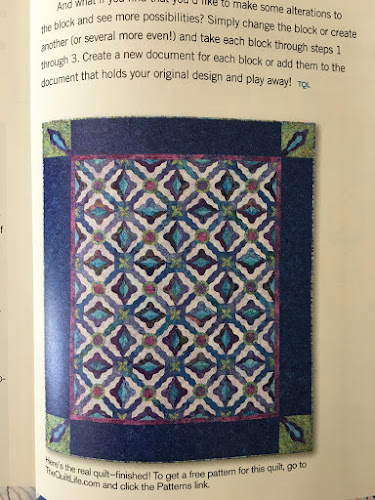
I am donating a lot of my magazines and some books to my quilt guild. I do have a bunch of magazines that have my Chanukah patterns or quilts in them. I thought there might be some quilters who would want the Chanukah patterns, so I am offering them for the cost of shipping. If you want one or more, email me and I will send you a PayPal invoice for the shipping cost. I will need your address.

I have 5 of these from McCalls Quilting, 2009

And this is the pattern.

I have 3 of these Quick Quilts, 2008

With a pattern for this:

I have just one of this 2009 Quivk Quilts


With this pattern

One Quilt Life, 2013


With my Frosty Flake pattern

The Love of Quilting, 2009

Has an article about my quilt, Willoway

2 copies of Quilting Arts


With an article about My Motherhood quilt - 2 copies (sorry it's sideways)

2 copies of QNM

Also with my Motherhood quilt

And finally, one copy of The Quilt Life

With an article about my Mexican tile hilts and a pattern for

They are all FREE!! Yes FREE! You just need to pay for shipping. I will ship anywhere n the world. As soon as you email me and let me know your email, which copy (copies) that you want, the cost of shipping will be determined and you will be sent a PayPal invoice.

So please take advantage of my de stashing and help me to not have any regrets!


Monday, August 22, 2016

Content, Content, Content

For better or worse, I have become aware of the importance of social media in promoting and growing a business. It's important to reach as many people as possible. I appreciate that you read what I write, and I share because we all have an interest in quilting or art. Would I rather spend my days at my sewing machine, stitching, designing and creating? I would, but then how could I share my knowledge with you. So I've decided that it's time to try and expand my audience.

So first I will share with you my most recent Mini Mosaic that I have named "Heart Milagros". This is what I really love to do- Design, Create and Share.

Then I will share that I am trying to offer information that you really want to read as well as consolidate my social media.I have 2 Facebook pages. One is my personal page and the other is my Professional page. I will only be posting quilty stuff to my professional page. To receive this stuff, you need to "like" me. You can do that by clicking HERE. I will no longer post to my personal page.

In addition to posting quilty goodness on Facebook, I will be sending out a monthly newsletter. The newsletter will include what I'm working on or have completed, a link to a free video tutorial, a fun artsy app, where I'll be teaching or exhibiting that month plus a recipe from Don's kitchen. (I'm so excited that he has decided to share his yummy recipes.)

If you have not been receiving emails from me, it means that you are not on my mailing list. To be put on my mailing list, click HERE. if you're already signed up for my emails, but you're not sure, it will let you know. A response in red will tell you.

I am so excited about sending out my first monthly newsletter. It will come out the beginning of September and include a tour of my studio, with a Show and Tell of a couple of my bicycle quilts plus my favorite tools. You'll have to sign up to find out my favorite photo transformation app and which recipe Don will be sharing. I know you will enjoy it.

I'd love for you to help me work on my goals of providing you with information that will interest you as well as growing my social media following. So "Like" me on Facebook - click Here and sign up for my Newsletter HERE. I promise I will not share your email with anyone and that you can unsubscribe whoever you want.


Friday, August 19, 2016

All Was Not Lost

When my trip was cancelled to the AQS Show in Grand Rapids, I gained 6 days. You know what I mean, those days when all of a sudden your plans fall apart and you can do whatever you want. With such a jam packed schedule I treasure these found days. It's like a vacation for me. So I decided to get some small projects done.

The first project was an apron for my grandson. He likes to bake with his Mom. I had a huge zucchini from my garden and I thought it would be fun to make zucchini bread and eat it!

The next project was a small quilt for Penn Oaks Quilt Guild. They have a quilt show every year and raise money for their speakers by selling tickets for mini quilts. I have lots of friends in Penn Oaks and plan on joining, so I made this adorable Bumble Bee quilt. The quilts need to measure 16"x20".

I found a pattern for paper piecing this cute bee on line. I enlarged it to 16" and then added the top and bottom borders. The pattern is by Modern Quilting by B. You can find the pattern at www.patternpile.com. The quilt show is in the Spring. I'm glad I got this done now and I'll let you know when the auction is. There a are a bunch of people that want this mini quilt, including me!

I bought the frame for this purse at a quilt show in July. I always wanted to make a bag with this type of frame. I found it was very easy. I'm glad I bought two frames because I think I will do something a little more involved next time- maybe with pockets inside or an outside with multiple fabrics. It's a May Chappel pattern.

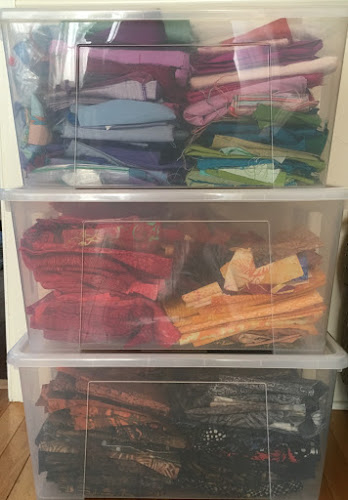
I also spent time organizing some of my fabric and working on a new website

I would say that these "found" days were very productive and rewarding for me. Hope you find some extra days in your week. There's nothing like it!


Step back in time

On the way home from our lake house, we stopped at the Kutztown Folk Festival. I've wanted to go for years becaus I heard they had quilts, but it never seemed to mesh with r schedule. This time it did. 
We headed straight to the Quilt Barn. It was filled with hundreds of quilts. Some were for immediate sale and others, the best ones, are to be auctioned. 

Wednesday, August 10, 2016

The Adorable DIY Curvalicious Skirt

The cuteness of this skirt comes from the scalloped hem made using Curvalicious, the fabric (Hawthorne Threads) and of course the model. Curvalicious is available in my Etsy shop. The model is NOT for sale, however her Mother did tell me that she will rent her out for the cuteness factor - just kidding!!!!!

I consulted a bunch of different size charts for measurments to create the skirt. I compared 6 different charts and I have to say the measurements were all over the place. I was only looking for waist and length to knee measurements. So I will not give measurements based on age or size. I recommend that you actually measure the child. There are only 2 measurements and they are easy to take.

Once you have the waist measurement, it is time to figure out the the amount of fabric needed for the scalloped hem. I take the waist measurement and multiply by 1 -1/2. So if the waist measurement is 22", I would need 33" of fabric for the width of the skirt. However, for the scallops to match at the seam where they are joined, the length needs to be a factor of 6. I would increase that number to 36". Then add 1/2" for joining the seam.

This would be what the calculation looks like for the width of the skirt.

1. Waist in inches x 1.5

2. Increase that number so it is divisible by 6

3. Add 1/2"

For the length of the skirt body, measure to the knee and subtract 1"

You will also need 3/4" non- roll elastic that is 1" shorter that the waist measurement

CUTTING

Cut two strips for the scalloped border, 4" x width of skirt

CUt the skirt body based on the above measurements and calculations

DIRECTIONS - skirt border

1. Place the 2 strips of the border fabric right sides together and fold in half

2. Place Curvalicious as close to 1 edge as possible and cut along the edge with a 28 mm rotary cutter

3. Unfold and pin the 2 strips right sides together. Sew 1/4" from the curved edge.

4. Clip the inner curves

5. Turn right sides out and using something like a bamboo knitting needle, smooth out the curves, press.

6. Cut fusible 2" circles and. Place them with the ruler.

Press in place and carefully open up the border and stitch in place with a blanket stitch. Tie off the threads.

I encased the raw edges when putting the skirt together.

7. Place the border on top of the skirt body, wrong sides together. ( yes, wrong sides together)

8. Stitch with a 1/4" seam allowance

9. Trim the allowance to 1/8"

10. Press this open and then press on the other side

11. Now fold it so the right sides are otgether and stitch with a 3/8" seam allowance.

12. Top stitch down along the seam

DIRECTIONS - skirt body

1. To sew the side seam together, follow the directions above starting with folding the skirt together with wrong sides facing.

2. Prepare for elastic insertion by first pressing 1/2" along the top edge to the inside

3. Fold over 1" and press again

4. Top stitch along the casing from the inside with a matching thread in the bobbin, leaving a 1" opening for inserting the elastic

5. Insert the elastic with a safety pin, being careful not to lose the free end.

6. Overlap the elastic ends and stitch across twice about 1/2" from each other

7. If possible, check the fit first and make any adjustments in the elastic. Stitch the opening in the waistband to close it.

8. Tada! Finished and ready for your own adorable model.

For more ideas for a Curvalicious hem, visit HERE